
Introduction
You already know you’re spending too much time on your phone. You’ve told yourself a hundred times — “Kal se kam karunga.” But tomorrow never comes.
Here’s the truth: willpower alone doesn’t work against apps engineered by billion-dollar companies to keep you hooked. What you need is a system — hard limits baked into your phone itself that make it genuinely difficult to keep scrolling mindlessly.
The good news? Both Android and iPhone have powerful, completely free built-in tools to set screen time limits — and most people have never used them.
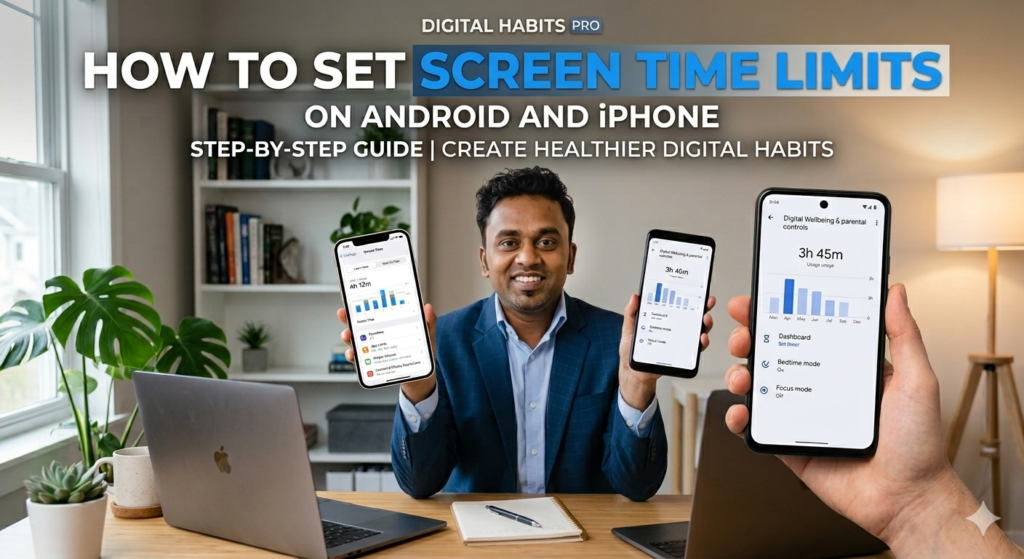
In this complete 2026 guide, I’ll show you exactly how to set screen time limits on Android and iPhone — step by step, with screenshots described clearly so you can follow along on your own phone right now.
Let’s get started.
Why Built-In Screen Time Tools Are the Best Starting Point
Before we dive into the steps, here’s why I recommend starting with your phone’s built-in tools before downloading any third-party app:
- ✅ Completely free — no subscription needed
- ✅ Already on your phone — no downloading required
- ✅ Deeply integrated — harder to bypass than third-party apps
- ✅ Covers all apps — tracks everything on your device
- ✅ Parental controls included — perfect for managing children’s devices
Now let’s look at both platforms separately.
PART 1 — How to Set Screen Time Limits on Android
Android’s built-in screen time tool is called Digital Wellbeing. It’s available on all Android phones running Android 9 and above — which includes virtually every Android phone sold in India today.
Step 1 — Open Digital Wellbeing
- Open Settings on your Android phone
- Scroll down and tap “Digital Wellbeing & Parental Controls”
- You’ll see a dashboard showing your phone usage for today
💡 On some phones like Samsung, this may be called “Screen Time” or “Wellbeing” — look for similar names.
Step 2 — Check Your Current Usage
Before setting limits, spend one minute looking at your current usage dashboard. You’ll see:
- Total screen time today
- Which apps you’ve used and for how long
- How many times you’ve unlocked your phone
- How many notifications you’ve received
This data is often shocking — and very motivating!
Step 3 — Set App Timers (Most Important Step)
App timers let you set a daily time limit for specific apps. When you hit the limit, the app icon goes grey and you can’t open it until the next day.
How to set an app timer:
- On the Digital Wellbeing dashboard, tap the circle/donut chart showing your app usage
- You’ll see a list of all your apps with usage times
- Find the app you want to limit — for example Instagram
- Tap the hourglass icon next to it
- Set your desired daily limit — for example 30 minutes
- Tap OK to save ✅
Recommended limits for common apps:
| App | Recommended Daily Limit |
|---|---|
| 20-30 minutes | |
| YouTube | 30-45 minutes |
| 30 minutes | |
| 20 minutes | |
| Games | 30-45 minutes |
Step 4 — Enable Focus Mode
Focus Mode lets you instantly pause distracting apps when you need to concentrate — during study time, work, or meals.
How to set up Focus Mode:
- In Digital Wellbeing, tap “Focus Mode”
- Select the apps you want to pause during focus sessions — Instagram, YouTube, games etc.
- Tap “Turn On Now” for immediate focus
- OR tap “Set a Schedule” to automatically enable Focus Mode at specific times
💡 Pro Tip: Schedule Focus Mode from 9 AM to 5 PM on weekdays — this automatically blocks distracting apps during study or work hours without you having to do anything manually!
Step 5 — Enable Bedtime Mode
Bedtime Mode is one of the most powerful features most people don’t know about. It automatically:
- Turns your screen to greyscale at bedtime (making it less appealing)
- Enables Do Not Disturb so notifications don’t wake you
- Can completely silence your phone during sleep hours
How to set up Bedtime Mode:
- In Digital Wellbeing, tap “Bedtime Mode”
- Tap “Set a Schedule”
- Set your bedtime — for example 10:30 PM
- Set your wake time — for example 6:30 AM
- Enable “Greyscale” option ✅
- Enable “Do Not Disturb” ✅
- Tap Save ✅
Step 6 — Set Up Parental Controls (For Parents)
If you want to manage your child’s Android phone:
- In Digital Wellbeing, tap “Parental Controls”
- Tap “Get Started”
- Download Google Family Link when prompted
- Follow the setup to link your child’s device to your parent account
- You can now set app limits, approve app downloads, see location, and set bedtime remotely from your phone ✅
PART 2 — How to Set Screen Time Limits on iPhone
Apple’s built-in screen time tool is simply called Screen Time. It’s available on all iPhones running iOS 12 and above — which covers virtually every iPhone in use today.
Step 1 — Turn On Screen Time
- Open Settings on your iPhone
- Scroll down and tap “Screen Time”
- Tap “Turn On Screen Time”
- Tap “Continue”
- Choose “This is My iPhone” (or “This is My Child’s iPhone” for parental setup)
Step 2 — Review Your Usage
After turning on Screen Time, you’ll immediately see:
- Your daily and weekly phone usage
- Which apps you use most
- How many times you pick up your phone
- Your notification count per app
Spend a moment here. The numbers are almost always worse than you expected!
Step 3 — Set App Limits
App Limits on iPhone work similarly to Android’s app timers — they cut off specific app categories after your set daily limit.
How to set App Limits:
- In Screen Time, tap “App Limits”
- Tap “Add Limit”
- You’ll see app categories — Social Networking, Entertainment, Games etc.
- Select a category OR tap it to choose specific apps
- Tap “Next”
- Set your time limit — for example 30 minutes
- Tap “Add” ✅
Recommended iPhone App Limits:
| Category | Recommended Daily Limit |
|---|---|
| Social Networking | 30 minutes |
| Entertainment | 45 minutes |
| Games | 30 minutes |
| Browsing | 1 hour |
Step 4 — Set Downtime Schedule ⭐ Most Powerful Feature
Downtime is iPhone’s most powerful screen time feature. During Downtime, only the apps you specifically allow can be used — everything else is locked.
How to set Downtime:
- In Screen Time, tap “Downtime”
- Toggle it ON
- Select “Scheduled”
- Set your Downtime start time — for example 10 PM
- Set your Downtime end time — for example 7 AM
- Tap back to save ✅
💡 During Downtime, only calls and apps you specifically allow (like Maps or Camera) remain accessible. Instagram, YouTube, and games are all locked automatically!
Step 5 — Set Always Allowed Apps
During Downtime, you can specify which apps remain always accessible — useful for essential apps:
- In Screen Time, tap “Always Allowed”
- Tap the green “+” button next to apps you always want accessible:
- Phone (calls) ✅
- Messages ✅
- Maps ✅
- Camera ✅
- Make sure Instagram, YouTube, and social media are NOT in this list ✅
Step 6 — Add a Screen Time Passcode (Very Important!)
Without a passcode, you can just tap “Ignore Limit” and bypass all your restrictions in one tap. A passcode prevents this.
How to set Screen Time Passcode:
- In Screen Time, tap “Lock Screen Time Settings”
- Enter a 4-digit passcode
- Re-enter to confirm
- Enter your Apple ID for recovery ✅
⚠️ Important: Use a passcode you won’t remember easily — or ask a trusted family member to set it for you! The whole point is to make bypassing your limits genuinely difficult.
Step 7 — Set Up Family Controls on iPhone (For Parents)
- Go to Settings → Your Name → Family Sharing
- Set up Family Sharing and add your child’s Apple ID
- Now go to Screen Time → Family
- Tap your child’s name
- Set all the above limits on their device remotely from your iPhone ✅
Quick Comparison — Android vs iPhone Screen Time Tools
| Feature | Android (Digital Wellbeing) | iPhone (Screen Time) |
|---|---|---|
| App Timers | ✅ Yes | ✅ Yes |
| Bedtime/Downtime Mode | ✅ Yes | ✅ Yes |
| Focus Mode | ✅ Yes | ✅ Yes (Focus Modes) |
| Greyscale Mode | ✅ Yes | ✅ Yes |
| Parental Controls | ✅ Via Family Link | ✅ Built-in |
| Passcode Protection | ✅ Via parental controls | ✅ Built-in |
| Ease of Use | 🟡 Moderate | ✅ Very Easy |
| Bypass Difficulty | 🟡 Moderate | ✅ Harder with passcode |
Recommended Screen Time Settings for Different People
👨🎓 For Students (JEE/NEET/Board Exam Preparation)
- App Timers: Instagram 15 mins, YouTube 20 mins
- Focus Mode: 9 AM to 6 PM (study hours)
- Bedtime Mode: 10 PM to 6 AM
- Screen Time Passcode: Ask parent to set it
👨💼 For Working Professionals
- App Timers: Social media 30 mins total
- Focus Mode: 9 AM to 5 PM (work hours)
- Bedtime Mode: 11 PM to 6 AM
- Weekend limits: Slightly relaxed but still set
👨👩👧 For Parents Managing Children’s Phones
- Enable Parental Controls fully
- Set strict App Timers for games and social media
- Enable Downtime from 9 PM to 7 AM
- Set passcode that only parents know
- Review weekly usage reports every Sunday
What to Do When You Feel Like Bypassing Your Limits
Let’s be honest — there will be moments when you want to ignore your screen time limit. Here’s what to do:
- Pause for 10 seconds before tapping “Ignore Limit”
- Ask yourself — “Do I REALLY need to open this right now?”
- If yes — open it. You’re an adult. You decide.
- If it’s just boredom — close it and do something else
The goal is not perfect restriction. The goal is conscious awareness. Even if you ignore the limit sometimes — the fact that you had to make a conscious decision is already a massive improvement over mindless scrolling.
Final Thoughts
Praveen, setting up these screen time limits takes less than 10 minutes. But the impact on your daily life — your focus, your sleep, your productivity, your relationships — can be genuinely life-changing.
Your phone is the most powerful tool in your pocket. But right now it’s using YOU instead of you using IT.
Set your limits today. Take back control. 💪